Showing posts with label craft. Show all posts

Monday, April 27, 2020

Sweater Repair

Y'all I am literally FINDING things to do.  I mean it is challenging circling between my bedroom, the living room, and the kitchen.  On one of my passes through I passed a pile of items that all needed mending.  You know how you stack things that need buttons, socks that have holes or various other garment afflictions.....well maybe that's just me that has a pile like this.

So I mended a few socks and then took off on this gal..... this is my Halogen sweater from Nordstrom.  I love it.  I am still clueless as to how I got a hole in it.  I went to put it on one day and noticed this hole right in the front of the sweater


No one has admitted to it, but I am wondering if maybe someone borrowed it and had a little snag that they never mentioned.

So I did a little Pinteresting about visible mending and I took a shot at it

I started with two colors of embroidery floss: one very close to the sweater color and a light color


I  made several rows of  stitching with the lighter color, pulling the hole closed


Then I started with the red, but realized I needed a contrast color. I was tempted to go with black, but since I wear this with jeans a lot I went with blue


So I used the blue to do stitching in the opposite direction weaving it in and out of the cream stitches

And then I decided to add a yellow too


So then I repeated these same steps in other random spots on the sweater that didn't even have holes....you know to make it look like it was always supposed to be like this


I think it turned out fairly well


There you are....one favorite sweater saved to wear another day!

Hope you have a great week......hang in there!

Monday, April 20, 2020

Painted Books

I have said a couple of times that I wish I had stocked up on craft supplies.......while I was buying tuna I should have grabbed a little more paint and fabric.  But, fortunately, I had bought the supplies for this project quite a while back.

I have this little table at the end of our sofa


But I felt like the lamp needed a little lift

So I tried a couple of old textbooks we had


And we decided to paint them 

We are using Annie Sloan Chalk Paint in Old White


The second color is Cocoa


And I had some gilding wax in warm gold for the pages


We just used a foam brush and laid the book flat and went to town painting

We had to let the first coat dry and gave it a second coat


The paint covered up all the textbook cover writing so well


Once the cover was dry....maybe 30  minutes or so, we started painting the page edges with the gilding wax


In hindsight.....we should have painted the pages first.  So if you give this a go, you might reverse the order

And then.....we tried them out under the lamp


Aww....there you go, sweet lamp, now you can stand proud and tall on our new painted books.

I got all my Annie Sloan paints from Art & Soul on Whitesburg Drive.  They are still doing online ordering and curbside pickup.  I knew my project was small so I just bought a couple of sample pots and I had more than enough.  I could probably paint another 6-8 books.....and I might.

Super easy, quick project if you are looking for one.

I hope you have an absolutely wonderful week.

Wednesday, November 20, 2019

Christmas Craft - Part 2

I hope you enjoyed the Christmas Craft idea from Monday.  If you missed it click here.  But just in case sewing is not your thing......you might enjoy what I have for you today.

Here is the thing.....I love Christmas EVERYTHING.  But you have to store all this stuff somewhere, so it is just not practical to buy everything Christmas.  However, that doesn't have to stop us from going all out.

For instance, when I shop for Christmas pillows I try to find the Pillow covers rather than actual pillows.  All year long I have 20 inch throw pillows on my couch.  So when it comes to Christmas I just zip off their cover and replace it with a Christmas cover.

Pottery Barn has a great selection.  Here are a few of the ones I have
All The Way Home Embroidered Pillow Cover
Car and Tree pillow cover

Merry Lumbar Pillow Cover
Lumbar Pillow
Hamilton Plaid Pillow Cover
Plaid Cover

Now if you like a good Homegoods shopping trip as much as I do, you can still shop there.  I search for the pillows that have a cover with a zipper.  I just donate the pillow insert and use my own pillow insert in these as well.

So essentially, I only have to store these pillow covers


which saves a lot of storage space.

Now I also have this bench on my landing

I  didn't want to have to buy a whole new cushion for it, but the bright yellow wasn't giving me a warm holiday feel.

So I went to JoAnn's and picked up this 
Soft & Minky Fleece Fabric -Dots
Minky Fleece in a bright red that would be perfect for Christmas.

I simply laid my bench cushion right down the center of the fabric


and I literally pinned it in place


We don't sit on this bench.  So I am not worried about the pins.

But now the cushion is covered in a more festive fabric and I just have to remove the fabric and store it for the off season......which will take a lot less storage space than having a whole different cushion


I added some simple pillows and now the bench is all dressed for Christmas.

Think of ways you can use what you already have.  Think about how to just give your regular things a more festive look.  You will save yourself some storage space and some money.

See you back here on Friday.


Monday, November 18, 2019

Christmas Craft

Welcome to Monday!  Hope you had a great weekend.

Ok, I have just a few Christmas Crafts to show you this week......just in case you want to whip up a few over the next few weeks.

Today, I want to share this custom fabric I found at JoAnn's.  They have everything from Disney to Super Heroes to Christmas prints.  I, of course, chose Christmas prints.

Honestly, look at how cute these are

Once you select your print, you get to choose what type fabric you want....fleece, poplin, knit or even a canvas.

I selected the poplin.  I was originally going to make these little nieces and nephews pillowcases they could enjoy during the holidays.  But then I decided I would make them each a giant gift bag.  This way they can gather all their goodies at all the grandparent's homes and family parties.

The poplin fabric is 58 inches wide so I only bought one yard. The first thing I did was fold the edges under and sew all the way around every edge.  I wanted it to have a nice finished edge everywhere so I didn't have to worry about raveling.

Then I bought  this bias tape.  Make sure you get the wide single fold


I simply laid it all the way across the fabric and pinned it in place


Then I sewed it in place keeping super close to each edge


This made the perfect little casing to feed some regular ribbon through to make the drawstring

All that was left to do was to sew up each side to make the bag.

Here are the finished products

Once I threaded the ribbon through, I simply tied a little jingle bell on to each ribbon


I think they turned out super cute


There are pages and pages of personalized fabric to choose from and the possibilities are endless.  

These were very easy and only took about an hour to complete all three bags.

Personalize some fabric today and make something cute for someone!

Have a wonderful week!!!!


Monday, July 22, 2019

A Class with Friends

My younger daughter can do some beautiful lettering.  We are always asking her to write on this card or present for us.  She can just knock it out in no time.  I took a class about a year ago, but really didn't practice very much.  It didn't come super easy to me and so I kind of didn't stick with it.  Well a group of us always ooh and ahh about her stuff so she agreed to give us a little tutorial.


She wrote each of our names to give us a little inspiration.  And she set us up with this starter kit.  We had her recommeded pens, a pencil, a sample alphabet and lined paper.  

She always uses these pens

Paper Mate Flair Felt Tip Pens, Medium Point (0.7mm), Black, 12 Count  (Packaging may vary)

PaperMate Flair 

They really aren't very expensive and they allow you to write your letter with a pretty fine tip then tilt the pen more on its side to make the thicker strokes.


We were so focused......hanging on her every word.


And then we went to work writing our alphabet


Some of us may have been doing more chatting than practicing


but we really did try to follow her instructions


when she was satisfied we had done enough practicing, she gave us two note cards to create and take home with us


She is so talented and what makes her even more special is that she is willing to share with others and help them learn too.

Thanks, Jansyn, for teaching us the basics of hand lettering.

If you have a talent or know how to do something fun, invite a few friends over and share with them.  We had a great night just hanging out and trying something new.

I don't have many talents, but if anyone ever wants to get together and group shop......call me!!!!

Have a wonderful week.  I'll meet you back here on Wednesday,


Wednesday, May 15, 2019

Summer Bucket List

I am setting some goals for the summer.  I hear myself all year saying.....I wish I had time to do this or that.  Well even though I have to still go to work.  Even though people still expect dinner every night.  Even though nothing in my life really changes that much in the summer.  It still feels like it is a little more relaxed and I should have some time to do some things.

So I am setting these goals up front.  Here are a few things I plan on doing this summer:

1) Take a chalk painting class
Annie Sloan_Antibes_OpenLid

I've done a little with chalk paint.  I own chalk paint.  I am going to figure out some fun things to do with it.....and officially take the class.


2) Work on my hand lettering
These free printable hand lettering practice sheets are designed help you practice the strokes of each letter to build up that muscle memory.

I took a class in this.  It did not come natural to me.  But I feel like with some practice I just might be able to master it or at least be decent at it.

3) Get my closet life together (flooring, reorganizing, purging)
WALK-IN CLOSET ático MD, decoración, ideas para la casa, myhome, On top - Macarena Gea
Not my actual closet but a good inspirational picture.  We bought new flooring for our closets a year ago.  Correct...ONE....YEAR....AGO....it is time for some installation to happen.

4) Get my storage container life together ( y'all this one cabinet - OUT OF CONTROL!!!)
Why can't you ever seem to find a lid and bottom that fit when you need to? Oh, that's because your cabinet looks a little something like this.    - HouseBeautiful.com
Not my actual cabinet.....but close....super close.  Are plastic containers rapid procreators....what happens when I close that cabinet door?  I don't know, but some of them are going to have to go.  And the next person at my house who washes out a sour cream container to keep is going into timeout.

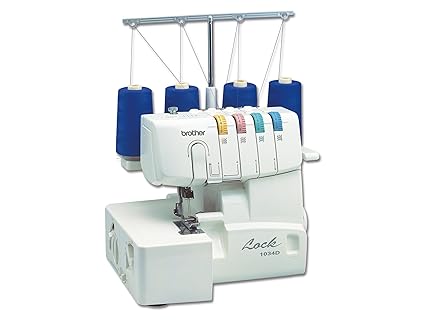
5) Learn how to use my serger.  Half of you are wondering what this is?  Just a magical seam finishing sewing machine.  I plan on serging some stuff this summer.
Image result for serger images

Any idea how many napkins I can make with a functioning serger.....tons....and then some.


6) I hate to even say this but - exercise
Image result for exercise meme

This one is last for a reason.....I don't want to do it. But I really am going to try.

Ok, I think that is enough.  Now that I have said it out loud here on this blog, I pretty much HAVE to do these now.  If you need a similar peer pressure, feel free to shout out something you want to get done this summer in the comments and this loving blog family will do our very best to shame you into getting your list done too!  See, we are here for each other.

So what's on your summer bucket list?

Let's do this!!!!

See you on Friday!

Monday, April 22, 2019

Vacation Gift Bag

We've got a little beach trip coming up.  Both of my girls are graduating this year ....one from high school, the other from college.  It is the high schooler's turn to get a graduation trip with her friends.  So four moms are taking seven girls to the beach following graduation.  We've got a nice beach house rented and it should be fun.

I thought it would also be fun to have a little gift bag on each bed for everyone.  Because....well...why not.....

So I started picking up little things and then I started looking for a little bag for my goodies and I couldn't find one anywhere.  So I decided to just make them

I went to JoAnn's and bought the following supplies

That is a yard and a half of a simple muslin, three spools of 1/4 inch ribbon and some fun beads.

First I folded the fabric to an 11 inch fold and cut across.  Since my fabric was 44 inches wide this kept my measuring to a minimum and made my cutting super easy.


This gave me three strips that were 22 inches wide folded in half for an 11 inch by 36 inch pieces


I simply folded it in half and then in half again.


I then ironed it to form the creases


Then when I unfolded it I knew exactly where to cut


This gave me four 9x22 inches pieces out of each strip.  So enough for 12 bags


Once all the pieces were cut.  I just sewed up each side and made a little pocket to pull the ribbon through.  I just put the ribbon on a safety pin and used the pin to work through the little pocket.  

Which gave me these

I just chose random beads to tie on the ends of the ribbon so the ribbon would not pull out

Then I stuffed them.

The girl's bags each have some hair ties, a mini chap stick and a face mask.  I bought all of these things at Sweet Pineapple on Airport Road.  I went to Target and got some hand sanitizer, a pair of socks and a box of Skittles.  I then added a fun beachy lotion from Bath and Body.

Here they are all tied up and ready for our beach trip


Wouldn't you like to find this on your pillow


I am doing bags for the moms too.  The contents of those bags will be a little different but still along the same lines.  You know.....just little fun treats as a surprise.

On one of my trips I got to stay at the Ritz.  Every night when I got back to the room, they had my bed turned back and a little surprise on my pillow.  I loved it.  It was just a fun thing to look forward to.

If you are going on a trip with friends or family this summer, why not surprise everyone with a little pillow surprise. If you didn't want to make bags, you could buy a clear goody bag at any craft or party store.  You could also leave each treat individually over the course of your trip.  Or you could use a simple paper gift bag.  Just have fun with it and do it your way!

Make it a great Monday and have a great week!!!!

See you back here on Wednesday.